

 3D Engine 13 - Finishing touches
Lens flares
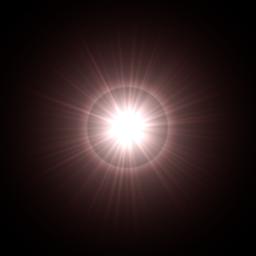
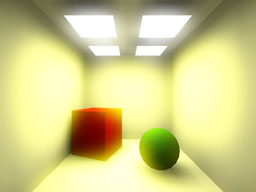
Lens flares are basically sprites, showing "reflections in camera's lens". You've certainly already seen it in telly or so (ie. in real world) It appears in the moment camera is viewing some bright lights or sun - you can see then line of sun's reflections as it's light passes trough objective and reflexes from it's lens. It's basically in two versions. The first one is what i've just described. There is more sprites, set on line, going trough screen centre and position of light on screen. But most times you can see different way of doing it. Since human's eye doesn't have more lens for light to reflect from, you can see only single sprite in position of light. Important is that it gets smaller as you approach to light. How to do that ? You simply determine if you can see light (cast a ray in it's direction or do some occlusion query in case you're using graphics hardware) and then draw (additively) single quad while light is in it's in centre. You shouldn't do any depth testing since it looks ugly and unnatural. What kind of texture to use ? Something like this one:
Lens flares are basically sprites, showing "reflections in camera's lens". You've certainly already seen it in telly or so (ie. in real world) It appears in the moment camera is viewing some bright lights or sun - you can see then line of sun's reflections as it's light passes trough objective and reflexes from it's lens. It's basically in two versions. The first one is what i've just described. There is more sprites, set on line, going trough screen centre and position of light on screen. But most times you can see different way of doing it. Since human's eye doesn't have more lens for light to reflect from, you can see only single sprite in position of light. Important is that it gets smaller as you approach to light. How to do that ? You simply determine if you can see light (cast a ray in it's direction or do some occlusion query in case you're using graphics hardware) and then draw (additively) single quad while light is in it's in centre. You shouldn't do any depth testing since it looks ugly and unnatural. What kind of texture to use ? Something like this one:
(3DS-Max)
And the result ...
(Unreal)

(Quake 3 Arena)
... in case you're creating textures, you should pay attention flare is small enough to fit inside, because
flare with cut borders looks very bad.
I won't give you any flare example since i've already used flares in lightmap tutorial and they are very simple anyway.
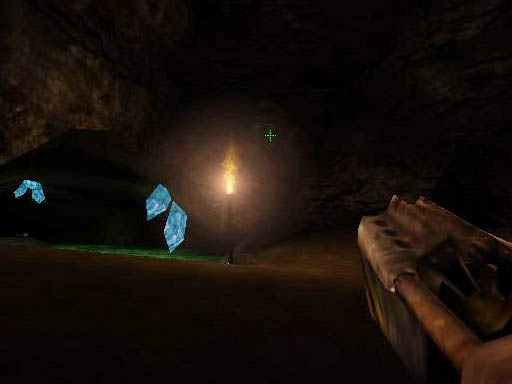
Recently the area-lights came quite famous so we'll need flares for it aswell. The less elegant sollution is to place more flares for point lights (i've just described them above) across the area of light. Better sollution is to add one more screen layer, clear it to black, draw area light polygons (either colored or textured, it doesn't matter) into it and then blur it. When you add such a layer to your image, all your area lights will glow nicely. If you want, you can let glow also other stuff this way. The result doesn't look bad at all:
I won't give you any flare example since i've already used flares in lightmap tutorial and they are very simple anyway.
Recently the area-lights came quite famous so we'll need flares for it aswell. The less elegant sollution is to place more flares for point lights (i've just described them above) across the area of light. Better sollution is to add one more screen layer, clear it to black, draw area light polygons (either colored or textured, it doesn't matter) into it and then blur it. When you add such a layer to your image, all your area lights will glow nicely. If you want, you can let glow also other stuff this way. The result doesn't look bad at all:
demo-group Farbrausch uses this metod quite offen
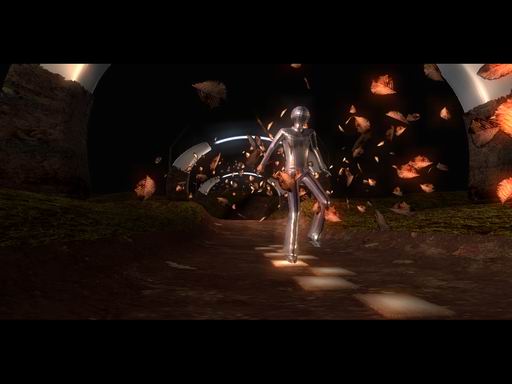
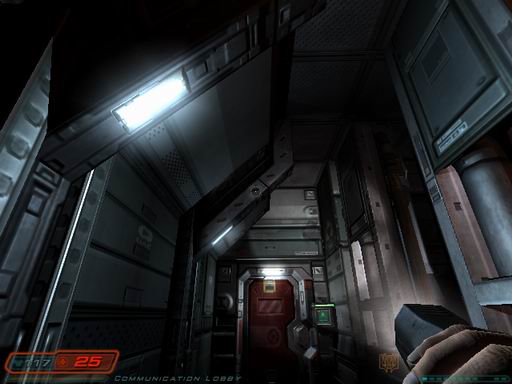
Another possibility, used for example by Doom3, is to create some kind
of geomethry that would look like flare and then (additively) draw it with smooth interpolation
of it's color. It's nothing difficult aswell, i'll add next illustrational picture:
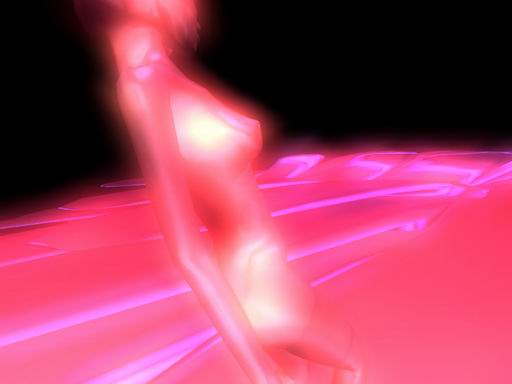
And just for the sake of clarify wireframe screenshot:
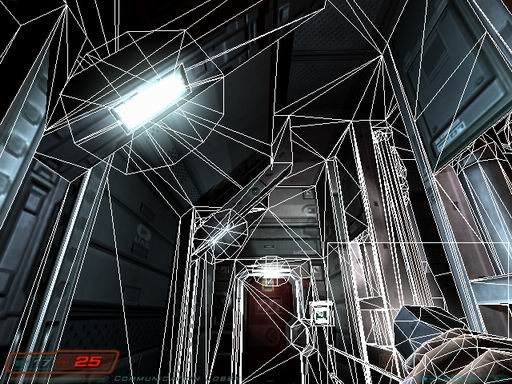
the kind-of-weird round geomethry is used for flares
Particle systems
Particle systems are used for many things like fire, smoke, electricity sparks or similar effects. You all know what does particle mean so it's not necessary to say particle system consists of some emmiter, generating particles and shooting them in some preset range of directions and particles itself. You move partices either in direction they were shot or on some ballistic curve or with so-called "bubble motion" - each particle is rotating arround it's imaginary bubble ... You can also add some effects like wind, turbulence or gravity.
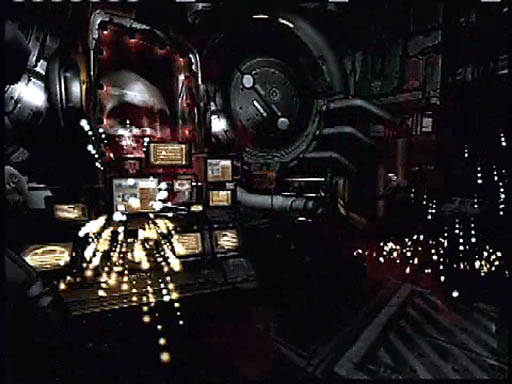
How to draw particle ? Use sprites again! But this time you should use depth test since there will be many particles and visibility queries for each of them would take too much time. Sometimes you use "aligned sprites" for example for sparks: sprite will then be rotated in direction particle is moving ... Another approach is to add partices trail. How? Simply draw particles more times, each smaller than previous one and a bit displaced againist it's velocity. It was used for example in Doom3: (this is shot from E3 trailer, but i ID used aligned sprites eventually as you can see in the game)
Particle systems are used for many things like fire, smoke, electricity sparks or similar effects. You all know what does particle mean so it's not necessary to say particle system consists of some emmiter, generating particles and shooting them in some preset range of directions and particles itself. You move partices either in direction they were shot or on some ballistic curve or with so-called "bubble motion" - each particle is rotating arround it's imaginary bubble ... You can also add some effects like wind, turbulence or gravity.
How to draw particle ? Use sprites again! But this time you should use depth test since there will be many particles and visibility queries for each of them would take too much time. Sometimes you use "aligned sprites" for example for sparks: sprite will then be rotated in direction particle is moving ... Another approach is to add partices trail. How? Simply draw particles more times, each smaller than previous one and a bit displaced againist it's velocity. It was used for example in Doom3: (this is shot from E3 trailer, but i ID used aligned sprites eventually as you can see in the game)
After - effects
These are all kind of (2D) effects, done after image is rendered. There should belong all operations such as gamma correction, brightness and contrast adjustment or so. In many games you have some "quad-damage" mode when whole screen brighten up, blur a bit and perhaps is colored a little ... There are many variations. I've prepared short list of effects i thought of when writing this text:
Old movie
Broken telly
Night-vision goggles
Painkiller boost
Under water
Hot air
These are all kind of (2D) effects, done after image is rendered. There should belong all operations such as gamma correction, brightness and contrast adjustment or so. In many games you have some "quad-damage" mode when whole screen brighten up, blur a bit and perhaps is colored a little ... There are many variations. I've prepared short list of effects i thought of when writing this text:
Old movie
- you'll need some color transformation that get colors more like sepia. you can also reduce blue - it should be a bit darker arround borders and a bit brighter in center - you can randomly add some fingerprints or hair and scratches or "cigarette burns" (editor marks) - film itself can be scratched by playing it too offen. it will show as bright vertical lines - film band can sometimes thump so image shakes (but for just one or two frames) |
Broken telly
- you can see noise in image. you should modulate it's level over time - there are "ghosts" in telly - image gets copied in effect of tv-signal reflections (horizontally) - image sync can fail - image is jumping up and down or "rotate" vertically - you can add some images that don't belong to your scene (again, for a few frames only) - image gets offen overbright or over-contrasted. |
Night-vision goggles
- most times green (light amplifier) or red (russian infrared) filter - it's almost always quite noisy, infrared is overbright when looking at lights |
Painkiller boost
- whole image goes black-and-white - image is deformated to it's center a bit - quite strong blur |
Under water
- some color filter - colors should fade a bit when under water - zou should disturb image with some kind of sine |
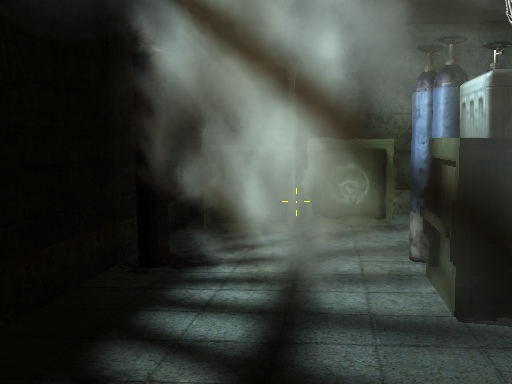
Hot air
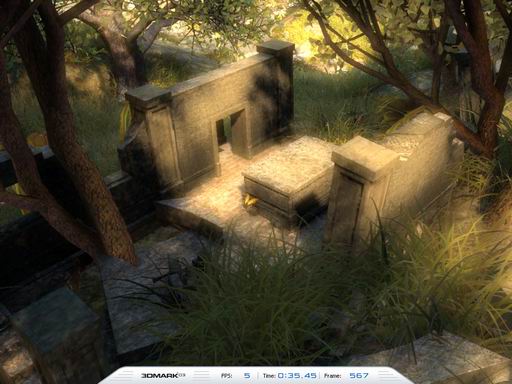
- it's the same deformation as with water, but only in some portions of screen. you should use
either alpha-channel or some particles. Screenshot from Far Cry:
|
Some image deformation is used quite offen so i should give it a bit more time. First way is to
have some texture with offsets and disturb your image (you'll propaby need temporary buffer for
this) or you can create polygon fence in size of screen and disturb it's vertices so image deformates
along with them. You can do all kinds of lens effecs this way.
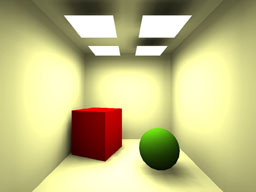
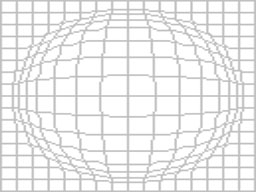
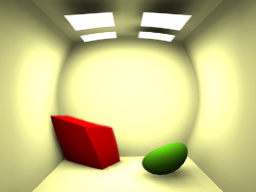
On the first image there's original image, on the second one there's polygon fence, used to re-render
image and the third one is final result. This is quite fine for water surfaces, but these days you'll
propably use some kind of shader ...
There should also belong fake HDR as well. You render your scene say 10% (or rather more) darker and then copy it to another buffer and treshold it to 90% (everything less 90% will be black) Then blur your second buffer (you can make it a bit brighter then if you wish) and add it to original image. Everything bright above 90% is gonna glow.
You can also perform some kind of exposure-control you know from radiosity by rendering frame, analysing it's brightness and rendering next frame with another brightness set. Although it's not as exact as HDR at all, it's quite fast and more - it looks great:
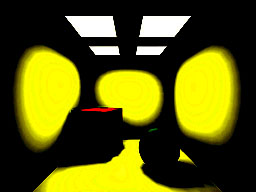
First image is original one again, second one is second buffer after treshold, third one (below the second)
is the same buffer after blur and the fourth one (below the original one) is the result of adding these
two together. Beware of bright colors if you want to use this, because the'll glow unnaturaly.
This trick was used for example in 3D Mark 2003 in "Nature" scene when you switched on post-production.
Antialiassing
Antialiassing is quite good thing, but it's usual implementation is quite performance expensive. Antialiassing gets edges smoothen so you don't see any jaggy pixels even in relative low resollution. There are many kinds of AA. The most common is FSAA (FS for fullscreen). It's also the simplest one to implement. You simply render screen with higher resolution and then scale it down. This is what all graphics cards do, you can chose one of 2x, 4x, 6x, 8x or even more. It means how many times higher resollution card to use.
There's also so-called quincunx. It requires resolution + 1, since it gets neighbouring pixels and sum them together with some weights. I think the original version was 1/2 for first pixel and 1/8 for four neighbouring (diagonaly) pixels. It's more like blur than antialiassing, but it works.
Best sollution you can do with software is to develop some kind of rasterizer that generate some information on how long part of polygon' edge will be solid and how long will fade to transparency. It's used for example in Open-GL where you can switch on generating this information in alpha-channel ...
... and this is how it look like in practice:

left with FSAA, right without (magnified 4x)
So ... i guess it's all for today. Next time let's learn something about OpenGL.
-tHE SWINe-
-tHE SWINe-
Valid HTML 4.01